
The Mighty Merc – 5 Gear Swap and Doubler Placement
Folks that know me know that I’m not really a fan of automatic transmissions. While the 4r70w in the Mercury was one of the few that didn’t routinely irritate me, I wanted it gone. Plus I had to pull it to fix a leaking rear main seal, so I didn’t see a reason for it to go back in!
So let’s start off with a parts list up front on this post to make it easier for those that want to go down this road. Here is my working combo:
– M5OD manual transmission. I used one from a ’97 4.2 V6 as it has the top shifter plate located further back than regular M5OD, but it still has the small block bell housing
– LUK Clutch (OEM Ford) 7128 (or M-6375-B302)
– 164 Tooth Flywheel form LUK LFW161 <— This flywheel wound up being junk out of the box due to a balance issue. Now running the O’Reilly Power Torque #NFW1128
– Pedal Assembly from a manual Explorer 6L5Z2455BB
– Slave/Master/Line assembly from Dorman CC649031
– Block off Plate for a 302 with 164 tooth flywheel Ford Part number D0AZ-7007 (Doesn’t quite fit perfectly, but close enough)
– 164 tooth starter TYC Part number 103223 <– This starter sounded like garbage, so it got swapped out.
– Pressure Plate Bolts Mr. Gasket 910
Essentially, you’re using the clutch, flywheel, and starter out of a ’96 F150, and Hydraulics/Pedals (Master/Slave/Line) from an manual transmission 1995-2001 Explorer to make this happen.
Depending on which transmission you grab, you might need to drill out the bell housing bolts to 7/16” as the 4.2’s use a smaller bolt to hold things together. It’s not a big deal as there is plenty of meat there to drill out the hole.
You’ll need to do a little wiring to make your reverse lights work and tell the vehicle that it is in neutral/park in order for it to start. The wiring changed from year to year, so check your application to determine what needs to happen where. Also, you’ll need to pay to have the thing tuned if you want to keep the check engine light off.
Now that’s out of the way, let’s have some fun! Pull your interior out so that you can get to the transmission tunnel access plate:
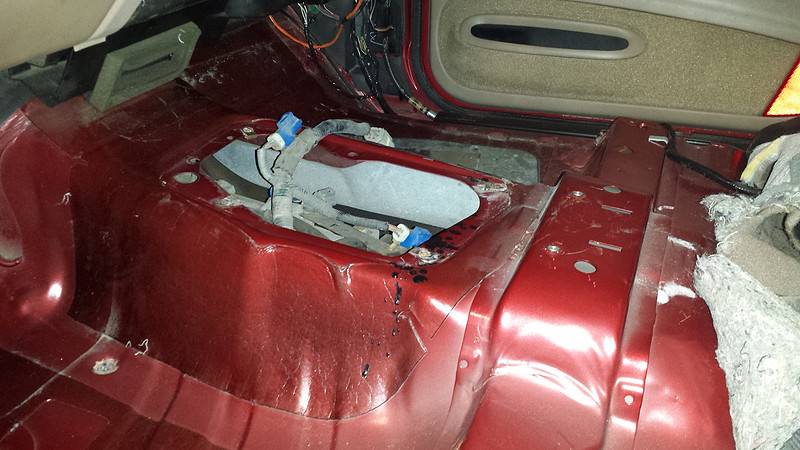
Unbolt some junk, and the automatic just falls out:

While you’re pulling things apart, yank the pedal assembly out and stab in your new assembly. Go ahead and pull your column shifter stuff out at the same time as it’ll be in the way of the clutch master cylinder. Note, you might have to bend some of the column shifter bracketry out of the way to make the clutch pedal travel appropriately:

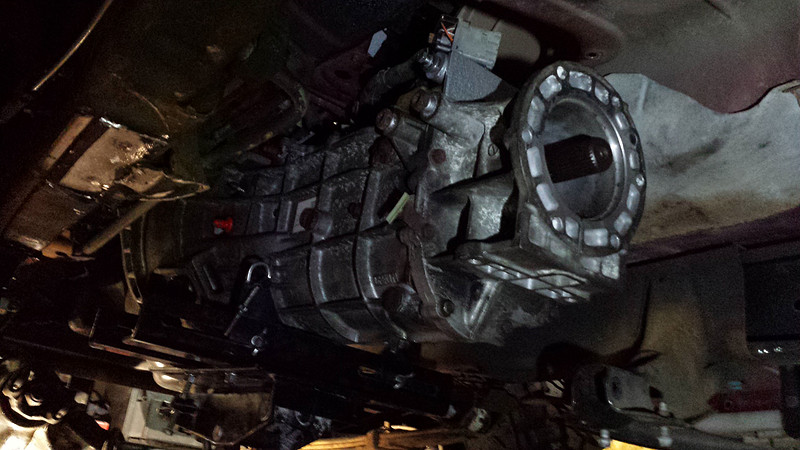
Slide your transmissions next to each other for a quick photo op. You’ll notice they’re pretty dang similar, however, the transmission mount is in a different location between the two, so you’ll have to do some fabbing to make that work:

With everything out of the way, go ahead and swap out that leaking rear main seal. A little tip here is to screw in some drywall screws and use those to work the old seal out:

Once that’s done, slap on your flywheel/clutch assembly:

Drill out the holes in your bell-housing if you need to:

A little wrangling, and you should get the trans stabbed into its new home:
Now, if you’re using a stock T-case, you’d just stick in on the end of your transmission and call it good. Since I’m putting this heavy giant doubler on the back of mine, things get a little more complicated. Step one was to get the mess assembled:

And then you get to realize that there is some trimming that needs to happen, and that your rear most mount won’t work out how you envisioned it. We’ll address that later. For now, let’s attack the clearance issues, this is the area that is causing me some grief:

So a little cutting later:

And I now have a giant hole in the floor, and I’m missing one mounting point for the seat. Here is another view from the underside, you’ll notice I had to hammer the center support to get a little more clearance here as well:

And here’s where the seat mount wants to live:

Oy! So after much fine tuning (read trial and error), I covered up the large hole, and made a new seat mount:

On the seat side, I lopped off the stock mount:

And made a new one:

So that every sat real nice again:

Now that the clearance issues are taken care of, it’s time to figure out how to hold all this stuff in place, but that’s for another post….